

I have been asked time and time again to do some tutorials on some looks. Well here is the first one of many to come. I wanted to start with a simple blended look before I get into the very detailed looks that I have a tendency to create, but be patient crazy, DIFFERENT looks are to come.
Here we goooo...
Products I used:
-Urban Decay Potion Primer
-Nyx White Base
-La Colors Lime Green Pencil Liner
-Urban Decay Electric Pallet
-Urban Decay 24/7 liquid liner in Perversion
-Urban Decay Super Curling Mascara
-Plenty of blending brushes
-Q-tips
-Lashes of your choice
-Barbie Ash Violet Circle Lenses
Step 1-
I always apply primer to decrease the oiliness on my lids and decrease the risk of your shadows creasing. You are going to apply the primer to the entire eye lid up to the brow and under the eye as well.
I always apply primer to decrease the oiliness on my lids and decrease the risk of your shadows creasing. You are going to apply the primer to the entire eye lid up to the brow and under the eye as well.

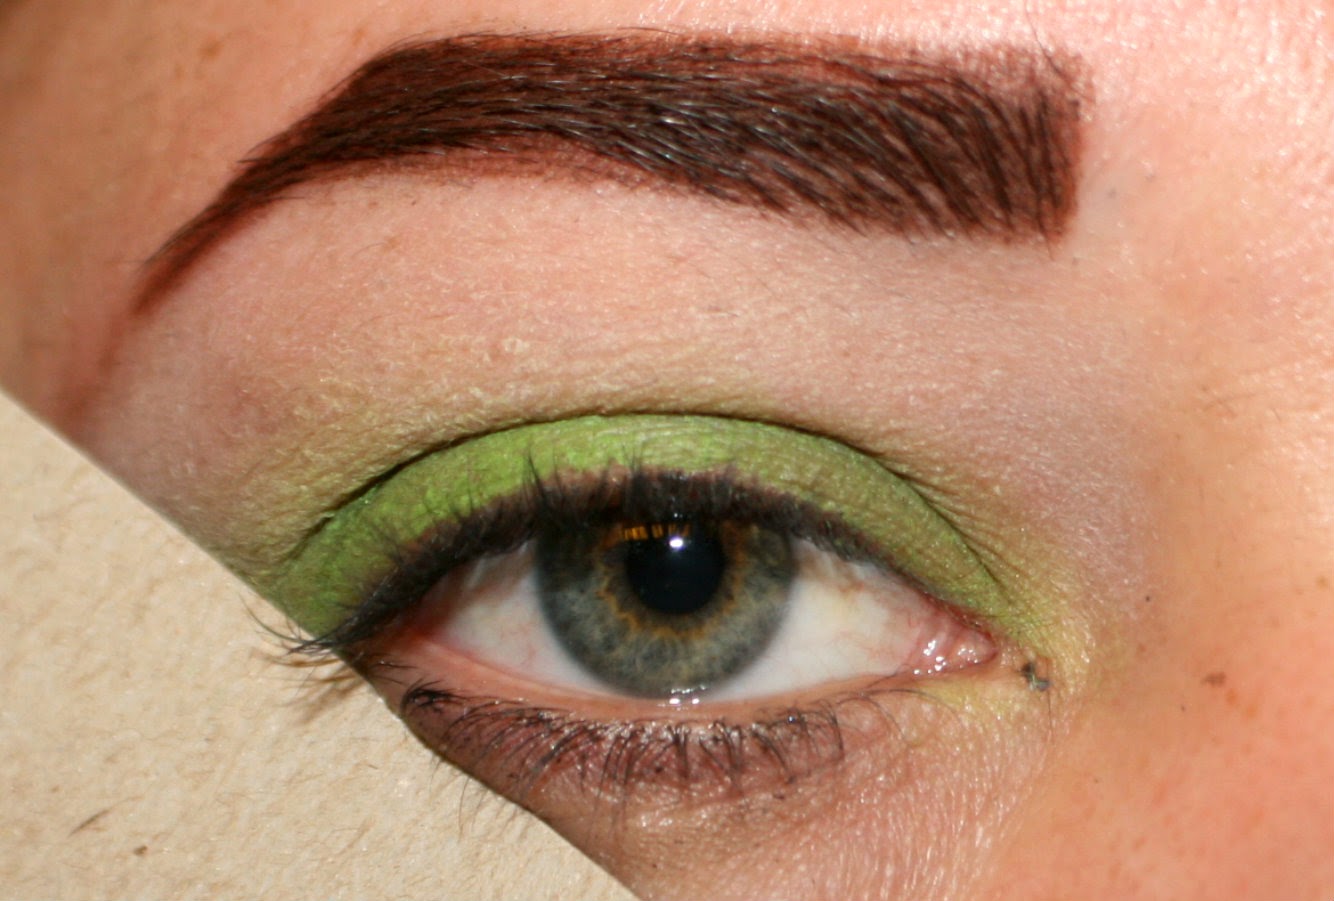
For this look we need to apply a white base all over the lid up to the eye brow, this will help to keep the shadows that we are about to apply as vibrant as possible. I also used a lime green liner on the eyelid and slightly blended it out with my finger, to use as a guidelines as to where the green shadows we are going to use are going to be placed.
Step 2-
When applying shadows I will be using this piece of cardboard as a guidline as to where I want the shadows to end on the outer part of the eye...Some people use tape so do which ever technique is easiest and best for you.
Step 3-
Apply a bright hot pink in the crease with an angled blending brush. This color will act as a nice transition color to help blend the colors flawlessly.

Step 4-
Next we are going to apply a dark fuchsia color with a clean domed blending brush more concentrated on the crease. This helps to add depth to the crease.

Step 5-
For this step we are going to place a dark purple even more concentrated on the crease then the dark fuchsia we used in step 4. This will help to deepen the crease even more. I used a fluffy blending brush for this step.

As you can see this dark purple went below the crease, but that's ok we are going to cover that up anyway. There is no need to be precise with this step.
Step 6-
For step 6 we are going to apply a teal toned shade on the outer third of the lid. This is where our crease is going to become more defined. I took this color up a little past the natural crease with a flat shadow brush.

Step 7-
Now lets add a bright pastel green on the middle of the eyelid with the same flat shadow brush as the previous step. Going up slightly past the natural crease and keeping the color right at the natural crease as you get closer to the inner corner. Using a clean domed blending brush blend this lighter green into the dark teal that we placed on the outer third of the eyelid in the previous step. This will help the eye lid colors look blended together and have a nice settle transition from shade to shade.

Step 8-
Now for some pop on the inner corner of the eyelid we are going to add a lime green shadow with a flat shadow brush while only going right up to the natural crease.

Blend this shadow in with the pastel green that's on the middle of the eyelid using a fluffy blending brush.
Step 9-
To start on the lower lash line, line the water line and a little below with the same bright green liner that we used in step 1.

Step 10-
For this step I used a clean Q-tip and dipped it in a matte cobalt blue eye shadow and placed it on the outer third of the waterline.

Then using the same technique placing an orange red matte to the middle of the waterline.
Step 11-
For the inner corner of the waterline we are going to place a metallic silver shadow with a dampened Q-tip. Using lighter shadows on the inner parts of the eye helps smaller eyes to appear larger.

Step 12-
For step 12 we are going to take that same metallic silver shadow and place it in the inner corner of the eyelid with a pencil brush and blend into the pink/ purple toned shadows placed above the crease, this will also help to make the eye appear larger.

Step 13-
To make the look come together we are going to blend the greens into the pink/purple toned shadows with a large fluffy brush to transition the colors nicely.
We are also going to blend the lower lash line colors together by using a clean Q-tip to blend to help the colors transition together.
Step 14-
Lets add some black liquid liner to the upper lash line with a little wing. I will be doing a wing liner tutorial in the future when I get the hang of it myself. So keep an EYE out for that.

Step 15-
Last step is apply the false lashes of your choice and pop your circle lenses in.

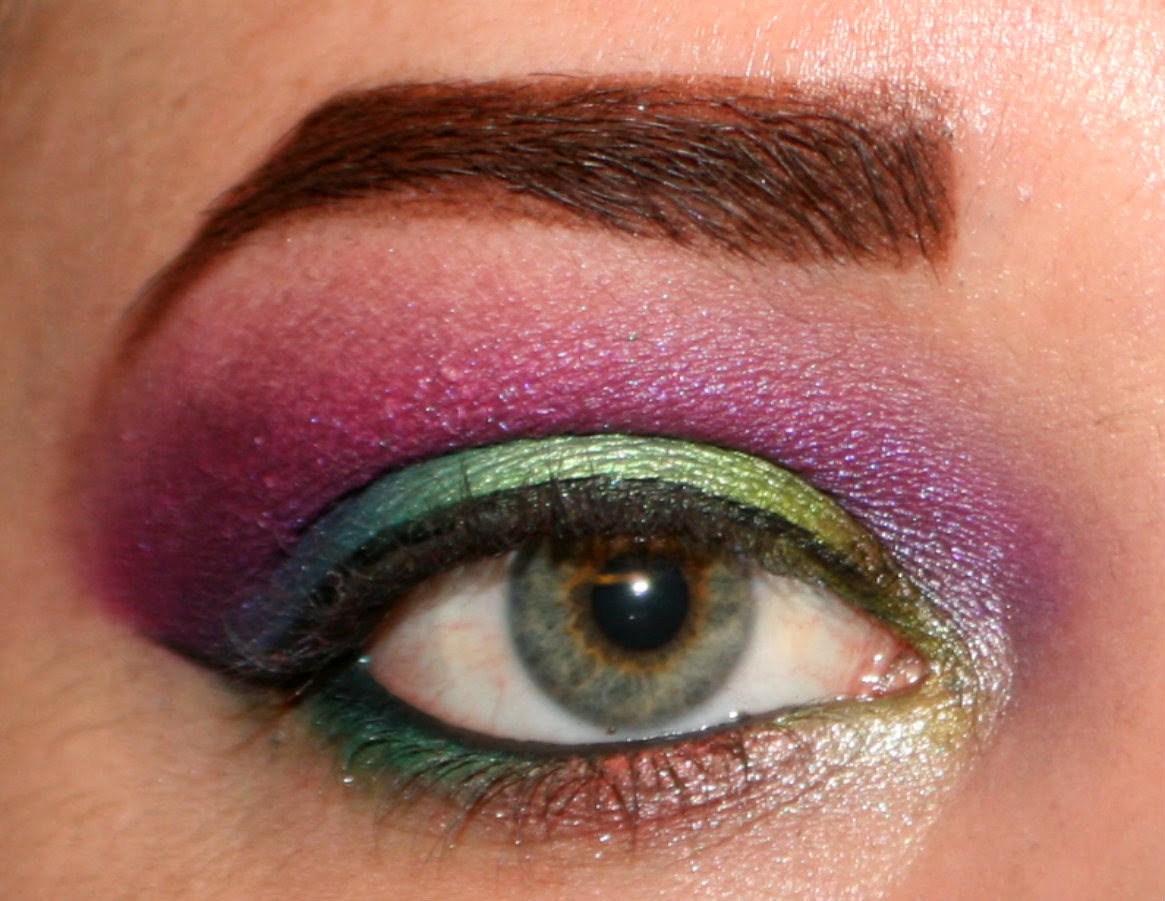
And Viola your Electric look is complete.

I hope that you found this Tutorial helpful.
Until Next time Remember...

No comments:
Post a Comment