Sunday, April 20, 2014

Welcome to the Ice Age-Makeup Tutorial - Glam Express

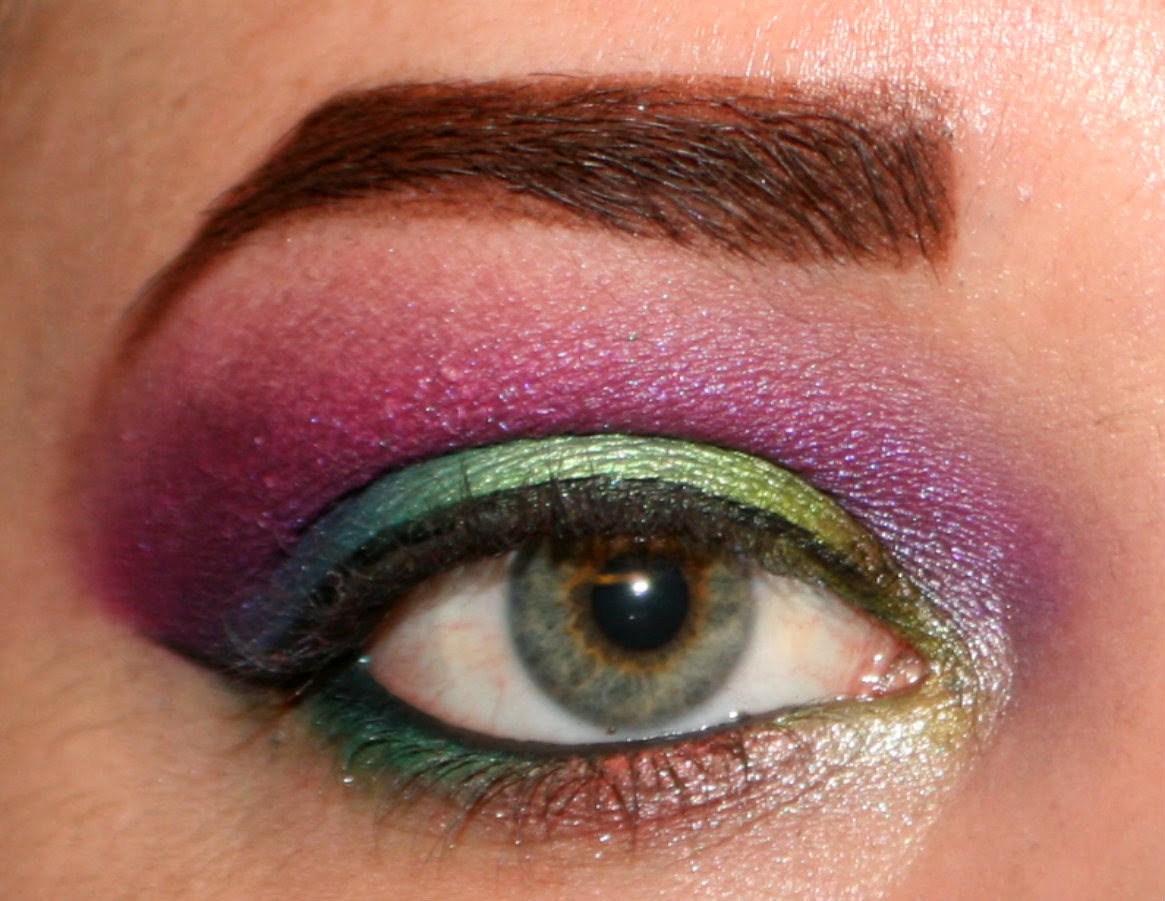
If you guys don't see what you like here on Differently Jo I also share Pictures and Blogs on Glam Express...If you would like to see a Tutorial on how I achieved this look go check it out at this link Welcome to the Ice Age-Makeup Tutorial - Glam Express


Let  me know if you stop by!! <3
 

Friday, April 18, 2014

Nuetrals with a BANG...SCM REVIEW

So when we think neutral we think of browns and blacks, but there are so many more colors that we can throw into the equation, like some of these amazing Star Crushed Minerals eye shadows that I received in my first SCM package!! Some of these shadows are packed with shimmer and glitter while others have the perfect matte opaqueness!!
See for yourself....
 
Here we have only a few of the many neutrals you can find on https://www.etsy.com/shop/starcrushedminerals
These are all available in 1g jars for $5.00.
 

(No Flash, Dry, No Base)
Bronze, 14k, White Bronze, Platinum, Luscious, Black
 
As you can tell already these are far from your normal neutral range, they may look similar to other shadows you have seen before but these have their very own uniqueness and that is what I look for in eye shadows so I fell in absolute love the first time that I swatched these eye shadows.
Now lets take a closer look at what makes these shadows one of a kind.
 
Bronze is a Copper shade packed with Micro sparkle and when used wet looks metallic...( this has been mentioned as a dupe for Sugarpill's Goldilux)
 
14k is a shimmery yellow toned gold with lots of gold sparkle
 
White Bronze is a very shimmery white with silver micro glitter throughout
 
Platinum is a sheer silvery white with silver micro glitter throughout
 
Luscious is a opaque matte cream shade...perfect transition shade
 
Black is a opaque matte black, and one of the darkest blacks that I have used
 
All of these shadows are very gorgeous and blend very well. They apply very effortlessly and are very smooth and feel silky. They wear for about 5-6 hours without creasing when used with a good primer or base. I would use Bronze, 14k, white bronze and platinum wet to get the full effect of their amazingness but look great dry as well. The golds and whites work perfect for an inner eye hi-light. My favorite out of these 6 would have to be Black because of its dark opaqueness.
 
Which neutral toned eye shadows are your favorite??
 
As Always....


Tuesday, April 8, 2014

Electric Tutorial...Differently Jo's FIRST Tutorial

I have been asked time and time again to do some tutorials on some looks. Well here is the first one of many to come. I wanted to start with a simple blended look before I get into the very detailed looks that I have a tendency to create, but be patient crazy, DIFFERENT looks are to come.
Here we goooo...
 
 
Products I used:
 
-Urban Decay Potion Primer
-Nyx White Base
-La Colors Lime Green Pencil Liner
-Urban Decay Electric Pallet
-Urban Decay 24/7 liquid liner in Perversion
-Urban Decay Super Curling Mascara
-Plenty of blending brushes
-Q-tips
-Lashes of your choice
-Barbie Ash Violet Circle Lenses
 
 
Step 1-
 I always apply primer to decrease the oiliness on my lids and decrease the risk of your shadows creasing. You are going to apply the primer to the entire eye lid up to the brow and under the eye as well.
 
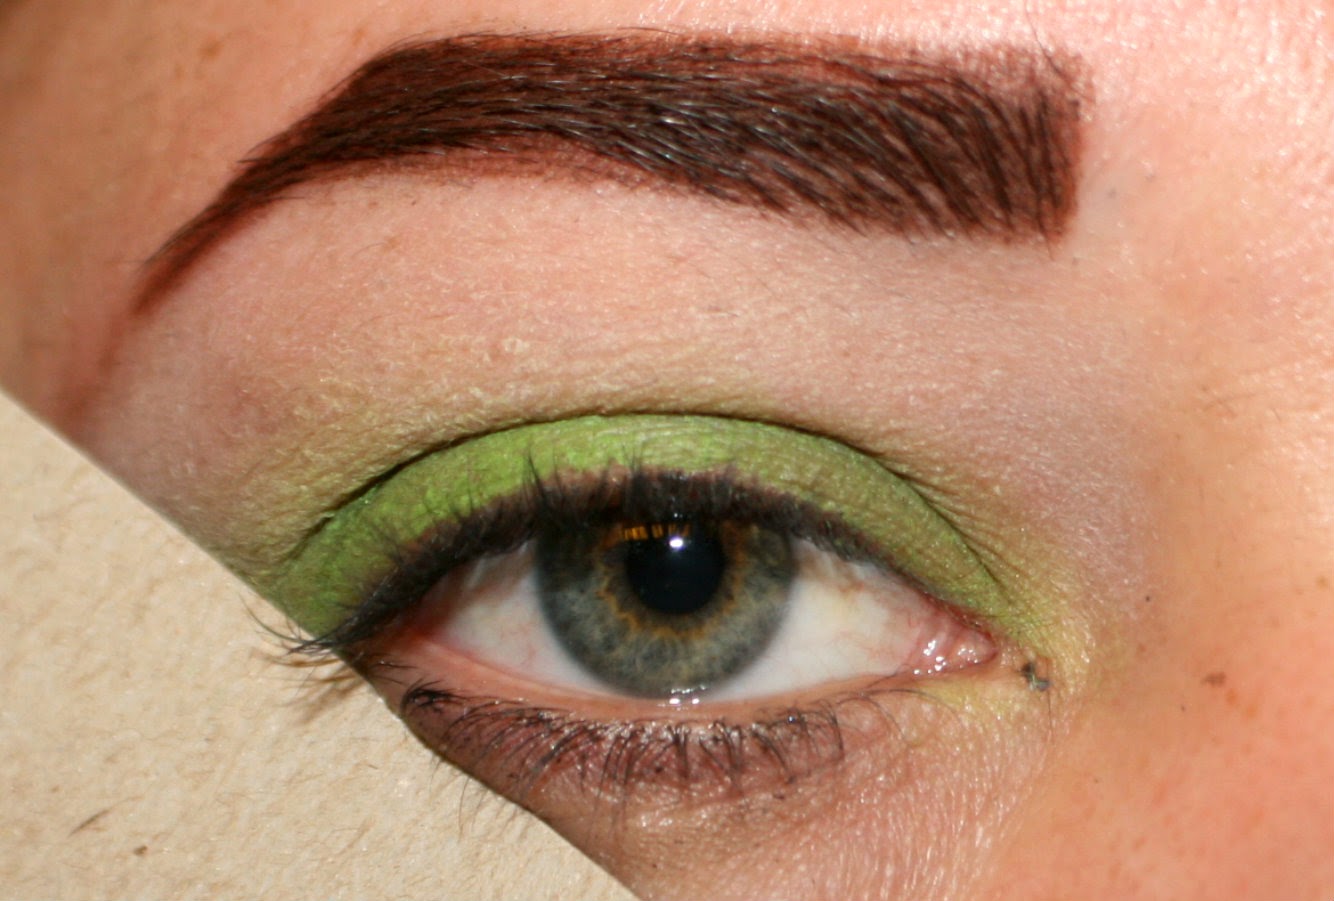
For this look we need to apply a white base all over the lid up to the eye brow, this will help to keep the shadows that we are about to apply as vibrant as possible. I also used a lime green liner on the eyelid and slightly blended it out with my finger, to use as a guidelines as to where the green shadows we are going to use are going to be placed.
 
 
Step 2-
When applying shadows I will be using this piece of cardboard as a guidline as to where I want the shadows to end on the outer part of the eye...Some people use tape so do which ever technique is easiest and best for you.
 
 
Step 3-
Apply a bright hot pink in the crease with an angled blending brush. This color will act as a nice transition color to help blend the colors flawlessly.
 
 
Step 4-
Next we are going to apply a dark fuchsia color with a clean domed blending brush more concentrated on the crease. This helps to add depth to the crease.
 
Step 5-
For this step we are going to place a dark purple even more concentrated on the crease then the dark fuchsia we used in step 4. This will help to deepen the crease even more. I used a fluffy blending brush for this step.
As you can see this dark purple went below the crease, but that's ok we are going to cover that up anyway. There is no need to be precise with this step.
 
Step 6-
For step 6 we are going to apply a teal toned shade on the outer third of the lid. This is where our crease is going to become more defined. I took this color up a little past the natural crease with a flat shadow brush.
 
 
Step 7-
Now lets add a bright pastel green on the middle of the eyelid with the same flat shadow brush as the previous step. Going up slightly past the natural crease and keeping the color right at the natural crease as you get closer to the inner corner. Using a clean domed blending brush blend this lighter green into the dark teal that we placed on the outer third of the eyelid in the previous step. This will help the eye lid colors look blended together and have a nice settle transition from shade to shade.
 
 Step 8-
Now for some pop on the inner corner of the eyelid we are going to add a lime green shadow with a flat shadow brush while only going right up to the natural crease.
Blend this shadow in with the pastel green that's on the middle of the eyelid using a fluffy blending brush.
 
 
Step 9-
To start on the lower lash line, line the water line and a little below with the same bright green liner that we used in step 1.
 
Step 10-
For this step I used a clean Q-tip and dipped it in a matte cobalt blue eye shadow and placed it on the outer third of the waterline.
Then using the same technique placing an orange red matte to the middle of the waterline.
 
 
Step 11-
For the inner corner of the waterline we are going to place a metallic silver shadow with a dampened Q-tip. Using lighter shadows on the inner parts of the eye helps smaller eyes to appear larger.
 
 
Step 12-
For step 12 we are going to take that same metallic silver shadow and place it in the inner corner of the eyelid with a pencil brush and blend into the pink/ purple toned shadows placed above the crease, this will also help to make the eye appear larger. 
 

Step 13-
To make the look come together we are going to blend the greens into the pink/purple toned shadows with a large fluffy brush to transition the colors nicely.
We are also going to blend the lower lash line colors together by using a clean Q-tip to blend to help the colors transition together.
 
 
Step 14-
Lets add some black liquid liner to the upper lash line with a little wing. I will be doing a wing liner tutorial in the future when I get the hang of it myself. So keep an EYE out for that.
 
 
Step 15-
Last step is apply the false lashes of your choice and pop your circle lenses in.


And Viola your Electric look is complete.
 
I hope that you found this Tutorial helpful.
 
Until Next time Remember...


Monday, April 7, 2014

Im Blue Dabadeda dabededa***

So in my first package from Star Crushed Minerals I received a large array of blue shadows and pigments...So I decided to have a blue swatch fest and I loved it.
 
Matte Teal, Cinderella, Scooby Snacks(pigment), Deep Ocean Blue, Electric Blue, Electric Teal Nebula
 
These shadows are so soft and what some would say feel as if they melt into the skin. They are very pigmented and blend well.  These are very few of the blue toned colors available at http://www.etsy.com/shop/starcrushedminerals
There is 1g of product in these jars and are available for $5 at the website listed above!!
 
Matte Teal, Cinderella, Scooby Snacks, Deep Ocean Blue, Electric Blue, Electric Teal Nebula
 With flash, No Primer or Base
Matte Teal, Cinderella, Scooby Snacks, Deep Ocean Blue, Electric Blue, Electric Teal Nebula
Without flash, No Primer or Base
 
*Matte Teal is semi opaque, sky blue, matte.
 
*Cinderella is a shimmery, dodger blue with specks of silver micro glitter.
 

*Scooby Snacks is a semi opaque, matte, dark cornflower blue pigment.
 
*Deep Ocean Blue is a shimmery, reflex blue, with light blue micro glitter.
 
*Electric Blue is a matte, semi opaque, royal blue.
 
*Electric Teal Nebula has a black undertone with a teal shift with light blue micro glitter throughout.
 
These Shadows are an Ice queens dream come true, and mine haha. I love these shadows and I have used these in multiple of looks so far and will appear in many more looks to come.
Don't forget to visit http://www.etsy.com/shop/starcrushedminerals to check these shadows out plus many,  many more!
 
Are you a BLUE lover???
 
Remember........


Wednesday, April 2, 2014

Lets Get Electric

Are you tired of getting Naked?? Well Urban Decay listened and released this bright, amazingly beautiful electric pallet to add to you collection! As to your surprise I was ecstatic when I seen that this vibrant pallet was going to be released as part of UD's summer collection 2014!! So lets take a walk on Electric Avenue...
 
The front of the Electric pallet is as vibrant as the colors inside. The case is a hard plastic case so its very sturdy for traveling.
 
When opened, the case has a hinge so the large mirror that is included is actually useable.
 
 Swatches with no flash
Swatches with flash
The Electric pallet is available at www.urbandecay.com for $49.00 
 

Revolt is a re-promote from the face case released late 2013 in the holiday collection. Revolt is a very pigmented metallic silver with specs of silver glitter.


Gonzo is a bright blue matte with silver micro glitter.
 

Slowburn is an orangy red matte with slight pearl. When blended it appears to have a stronger hint of orange than red. This color is very pigmented.
 

Savage is a very pigmented bright matte hot pink.
 

Fringe is a metallic Teal.
 

Chaos is a cobalt blue matte with specks of blue micro glitter.
 

Jilted is a metallic fuchsia with a light blueish purple shift
 

Urban is a metallic purple.
 

Freak is a bright pastel green with lots of shimmer and has a bit of a gold shift.
 

Thrash is a lime green matte with a hint of a gold shift.
 
I almost forgot about the double ended brush that is included in this pallet because I was overwhelmed by all the amazingly vibrant colors. But this brush is a very good quality for an extra to a pallet. I've only used once but it seems to do its job.
 
 
Overall this pallet appears to be matte, but most of the mattes are not true mattes as they have hints of micro glitter or hues of pearl, but when blended and applied with other colors there is not enough glitter or pearl to notice.
I absolutely recommend this pallet if you are a brights lover! My favorites out of this pallet are Gonzo, Jilted, Urban and Freak. I feel as if there are a lot of blue toned colors in this pallet and Revolt seems to be a little out of place here! If revolt were to be replaced with a Yellow I believe this would be the perfect bright pallet.
 
*Some may be concerned about the Warning on the back of the packaging saying that Slowburn, Savage, Jilted and Urban are not intended for use around the immediate eye. But I have used these colors and I have had no problems of irritation or staining so if you have used pigments around the eye area before and had no bad reactions then you are more than likely going to be golden with these pigments.
 
So are you planning on getting electric, if so what color are you most looking forward to using??
 
Until next time...